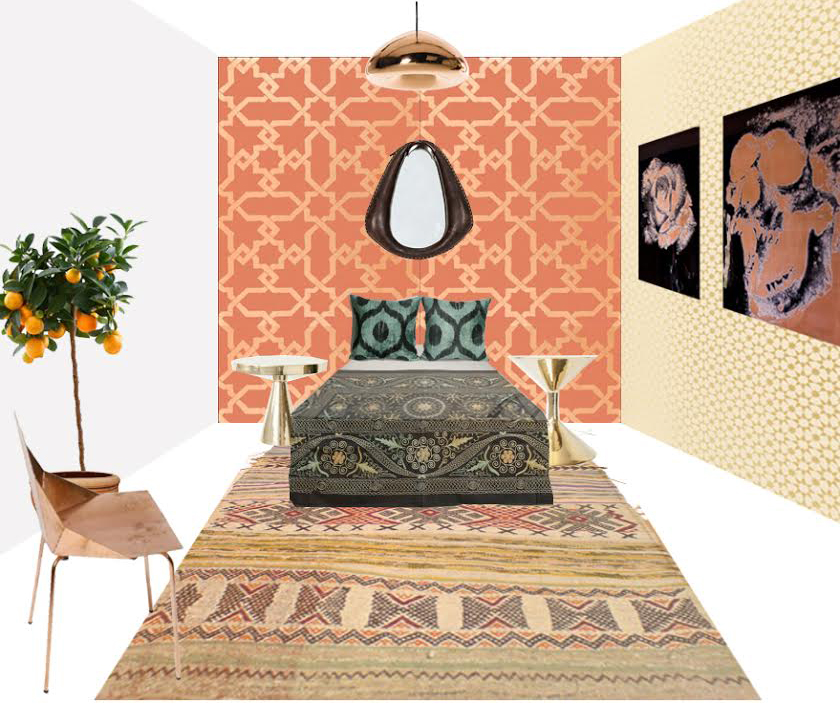
Room renderings are a really important tool in my career–not just for blog posts and decor clients, but also when I’m pitching ideas to brands for partnerships. (The above image was my original rendering for the AirBnB project I worked on a couple of years ago.) I even make the renderings sometimes just to have the ability to better imagine how different pieces will work together. I mean, I chose these pieces because something about the colors, textures, scale and era spoke to me and I felt they’d work well togather–but it’s really hard to picture what all of the elements would actually look like all in the same room without creating a rendering. Would the wallpaper be too much? Would the bedding work with the pillows? Would the rug tie everything together or make it feel totally over-the-top?
Kind of like my tutorial on repeating patterns, I didn’t take a class in this, nor do I claim it’s the best method– it’s just the method that I came up with after years of creating these collages for clients and for the blog. And since a few people have asked about my renderings lately, I thought I’d share a little tutorial here.
I know there are a ton of programs and apps out there that can help to do this (or something similar)…but I have always done them in photoshop and if you’re already familiar with the program, I think you’ll find this tutorial to be really pretty simple.
1.) Find all the elements that you want to use in the room, download them at their largest size and save them in a folder. It makes things a lot easier to pick items that are already on white backgrounds (seamless) and all facing front. Also, don’t pick items that are too tiny because if you enlarge them too much they’ll lose resolution and appear blurry. I will be using the above pieces to create my rendering.
2.) Open the documents in photoshop, and add them to a single document, each on a separate layer.
3.) Cut out each one from their background (I normally use the Magic Wand for this…sometimes I also use the Magnetic Lasso if the items aren’t already on a white background…)
4.) Hide all layers except for the background and the flooring (could be hardwood, a rug, whatever you’re working with…)
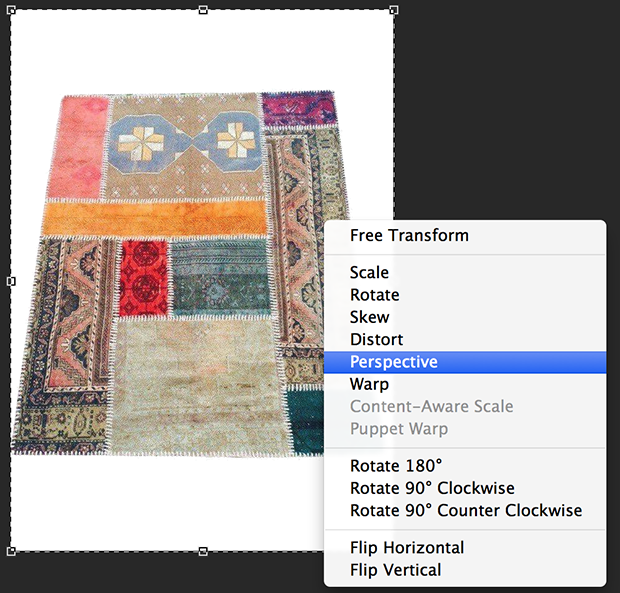
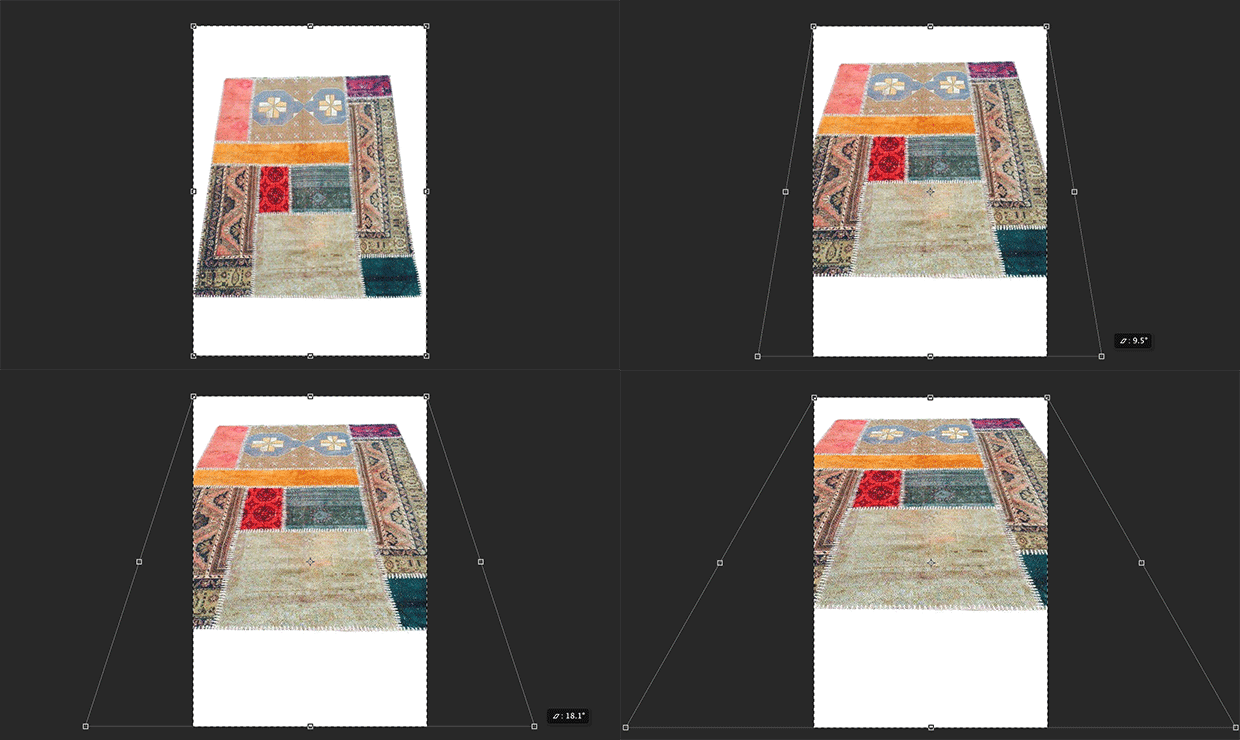
5.) Use Command T transform the object. Then, Control Click the object and a menu bar will come up. Select Perspective from the menu bar. You will notice tiny squares appear on the corners and mid-points of the selected image. Click onto the bottom left or right of the object and pull outwards (as demonstrated in the below gif).
The perspective of the flooring will start to change and look like its laying on the floor. Once it feels like it’s at the right perspective, place the rug/floor option at the bottom of the document.
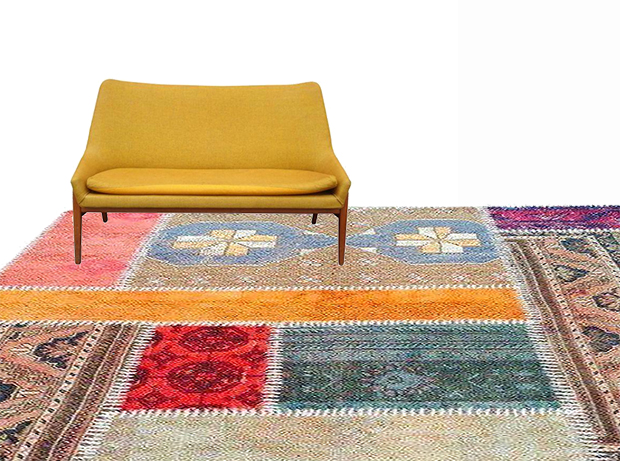
6.) Next place the primary piece of furniture (the one that anchors the space) on the rug. In this case it’s this mustard love seat. You’ll want to find a forward facing image for this to work properly. Place it on the ‘flooring’ and make sure all four legs are ‘resting on the rug. Adjust the size of the object by using the Transform tool (Control T), and holding down the Shift ket so the dimensions remain in tact.
7.) Resize the other pieces based on the size of the primary piece of furniture.
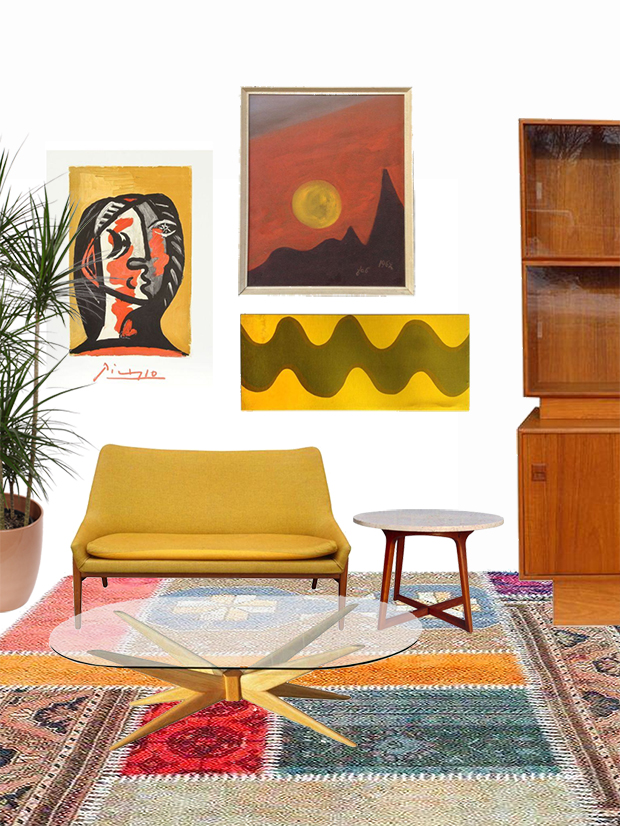
8.) Move items around and place items where they look best. Change perspectives and placement as needed. You might need to play around a bit until you find the best arrangement.
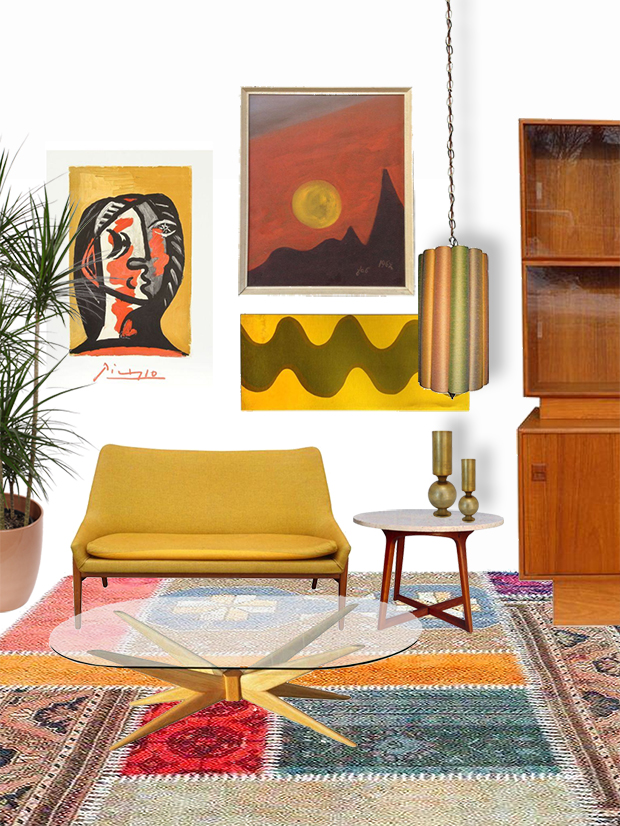
9.) If you’d like to create transparency for glass like I have done for the glass coffee table, follow these steps: a. Duplicate the layer by pressing Control J, bring the opacity down on the duplicate layer by 40%. b.) Cut the ‘glass’ part out using the Magnetic lasso tool on the original layer. c.) Merge the two layers together.
10.) To further add to the perspective, if you have items that you’d like to appear further away from the wall, like the swag lamp or vases on the side table add a drop shadow by going to fx > Drop Shadow (at the bottom of the layers window). I like to keep the shadow subtle with high transparency..a little shadow goes a long way to make the space come alive.
11.) To get the look with the wallpaper I cut the bottom part off of the original image I had, to make it an even square, and cut and pasted the squares until the back ‘wall’ was completely covered–almost how actual wallpaper would be installed.
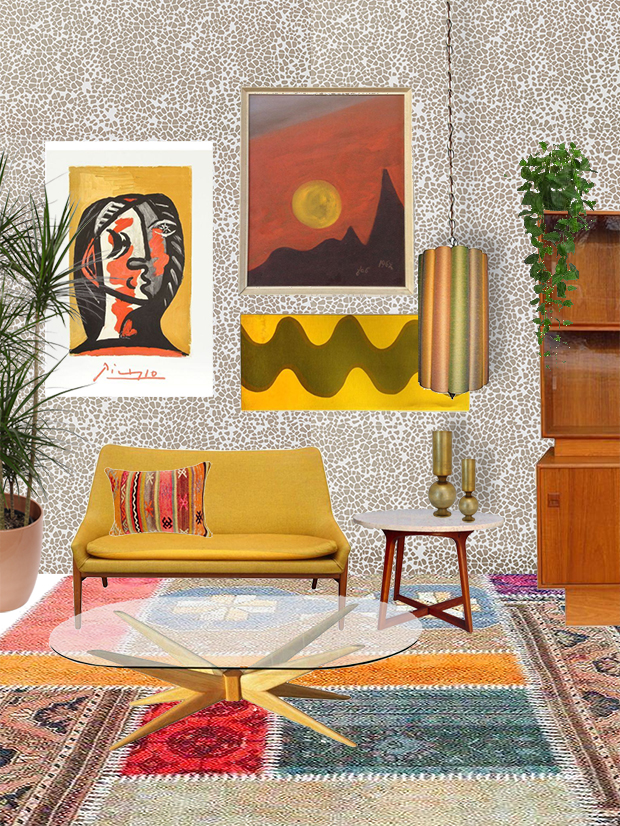
12.) Next I added any final accessories to the mix to make it look polished and adjust any sizes…like the buffet was looking a little too large…And boom! All of the sudden I can get a great sense of what the feel of the space is going to be.
Do you create room renderings? I’d love to hear your favorite tools/apps and tricks! Chime in below if you have anything to add or questions about my method.
SOURCES: You can find all the furniture and decor pieces used in my rendering on my favorites at Chairish. The wallpaper is by my girl Oh Joy over at Hygge and West.



great tutorial!
The transform tool is life changing (dare I say, ‘transformative’?)!
I used to love playing at Olioboard. I have a huge library of room decor images there – gotta revisit there and play. But ohhhhhhhh … thank you for the perspective tip – I’ve used everything else in transform EXCEPT that!! Had no idea. Now I can play with all the rugs! Thank you.
right?! The perspective thing helps so much–when I stumbled across it I was like OOOHHHHH!! haha. xx ~J
This looks great! I’ve used Olioboard but not Photoshop. I definitely want to try this. Is this the free Photoshop or the purchased one? I want to give it a go! Thanks for the tutorial!
I have a monthly pass through Adobe for the Create Suite–but I think you can download a free trial of photoshop that’s good for one month.
Love this tutorial! Best I’ve seen so far! How did you create the different walls in the first photo?
Hi Justina,
I am Photoshop! I came across your blog tutorial and it is great, however let me repeat, I am a NEWBIE! I am having a difficult time combing my layers to make a board. Could you direct me to a source that is really easy to understand in creating boards. I pretty much need step by step instructions to get going, but everything I Googled isn’t really addressing Interior Style Boards.
Your help is greatly appreciated!
Tamara
Thanks for the tutorial! I am very curious if you happen to know where that mustard love seat is from. I’m looking for something with those exact midcentury lines and size for my sunroom!
Thanks,
Leslie
Hello! Where do u get your images from? Furniture, wallpaper, accessories, etc.. just a hi res piece from the internet?
Thank you! this was a great step by step tutorial on room renderings, especially for beginners. check out at https://cadcabin.com for similar tutorials on renderings and other services.