
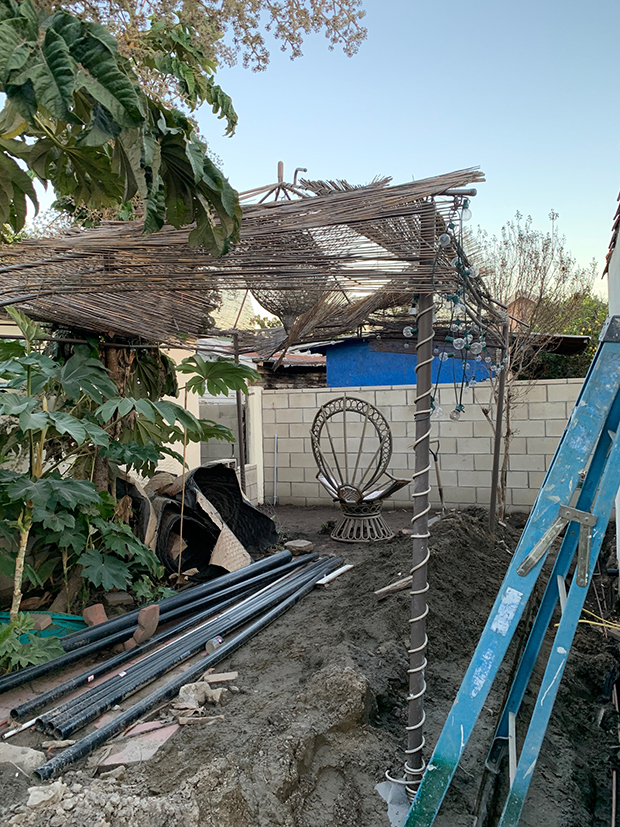
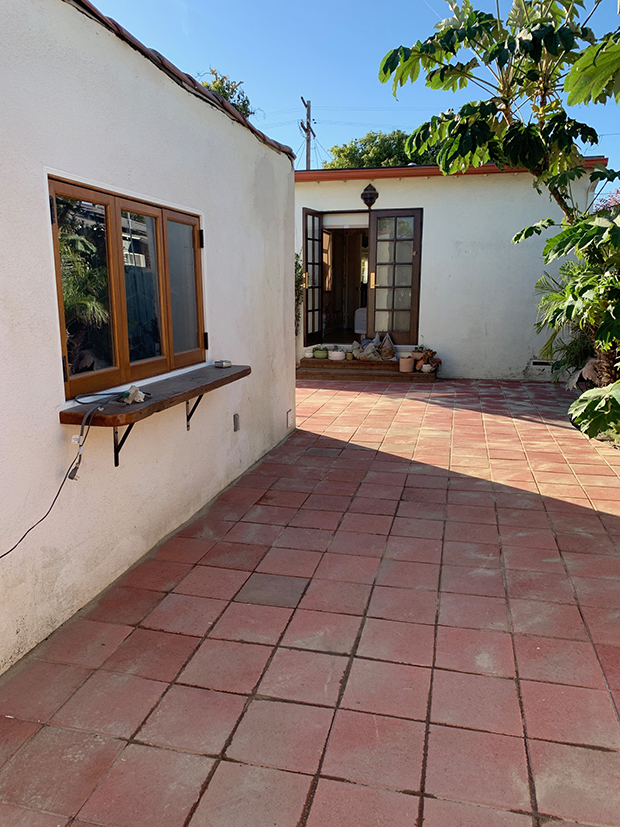
This is what our backyard looked like for months on end during the #CasitaJungalow remodel project. And the heavy rain we experienced in L.A. this past winter was great for Mama Earth, but not so great for construction. Our yard got pretty trashed, which gave us a good excuse to stare outside our bedroom window every morning and evening and dream about what we were going to do with this space. Our fantasy of putting a pool in here was long gone, but we did keep room in the budget for a hot tub. Besides that, everything was pretty amorphous–we weren’t sure how much budget would be leftover at the project’s end.
A few things were clear, however. We have a ‘bar window’ leading from this outside area into the Casita wet bar, and planned to use leftover tiles from a past project for an outdoor shower. Also clear? Our budget looked pretty tight so we needed to rely on some ‘path of least resistance’ designs as well as some DIY’ing — as labour is often the most pricey thing.

First up, we needed to do something with this cinder block. I had San Tornini on my mind — to make this area feel like a Greek Isle vacay, with lots of curvy, white plaster mixed with tons of plants and some fun pops of terracotta and maybe some cerulean blue.

So we (well, actually Jason) covered the cinderblocks with Quikrete Stucco. I was surprised with how quickly he did this. It took him about 4 hours to complete the entire thing, and I’m really happy with how it turned out. San Torini Style wall dreams? Check!
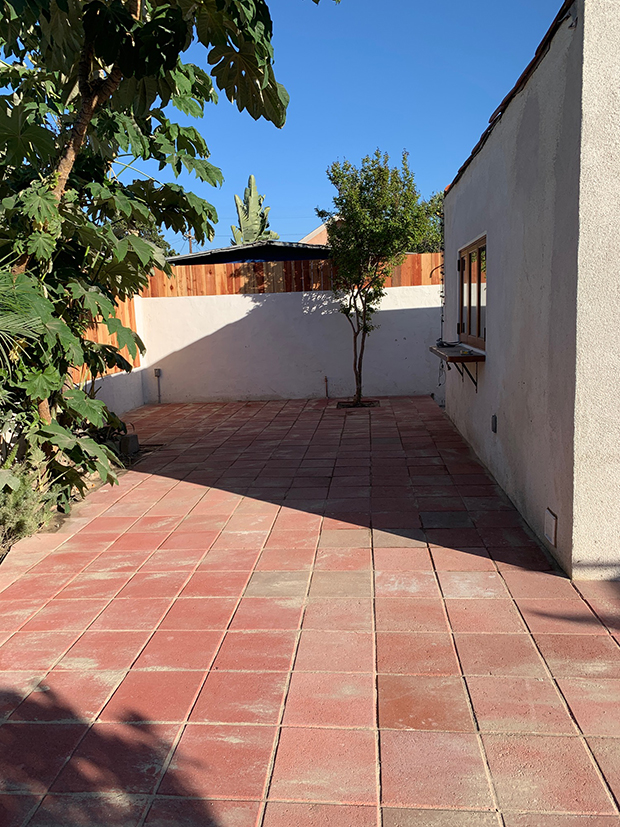
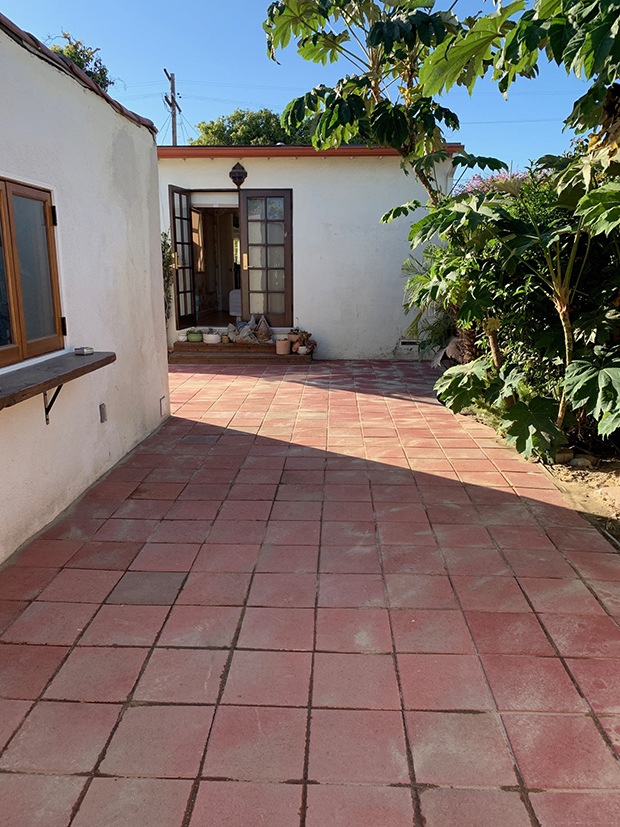
Once that was done we had to figure out the flooring. I had a vision that this whole area was done in cement tile–and it was incredible. But alas, that was too extravagant. We already had about 100 pavers that came with the house, so we felt like this would be a good place to save (plus be less wasteful) and so we bought a few more simple, affordable pavers and paved the entire area with pavers instead.

Our contractor and his team helped to even out the area even first. But once the ground underneath was even, it was quick and easy to cover the whole area in pavers. We have plans to add outdoors rugs to add more visual interest to the ground and delineate the areas more.
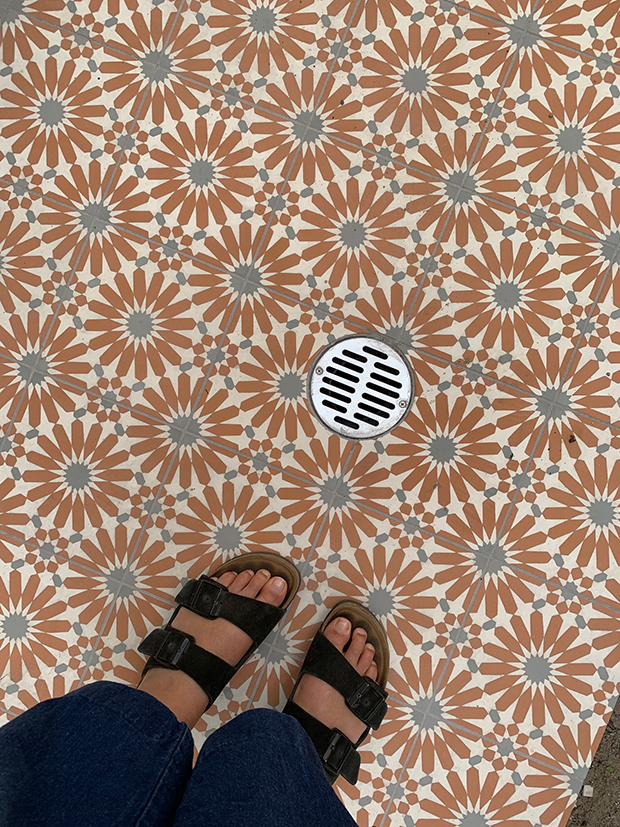
My cement tile dreams, however, were not totally lost. We had several boxes of tile leftover from a past project.
And we decided to use said tile in, what would soon become, our outdoor shower area.
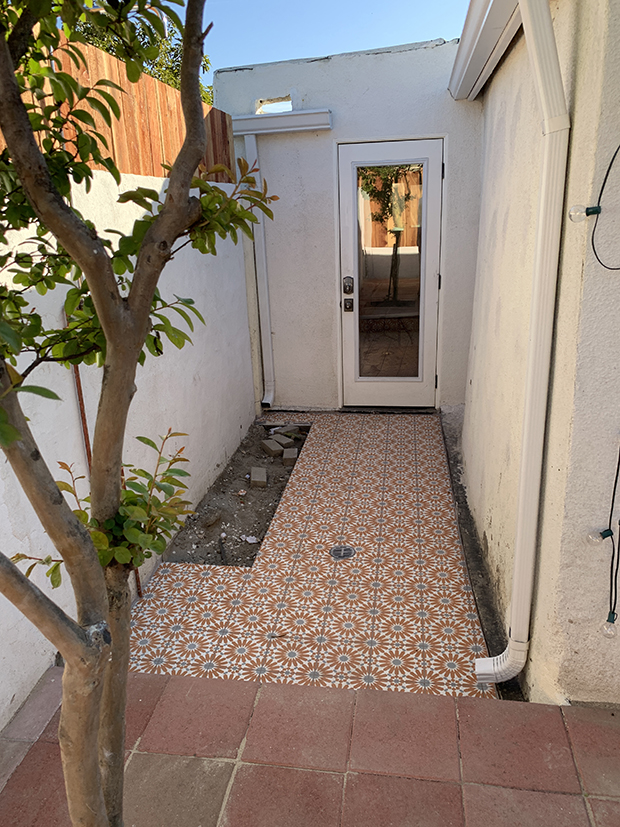
Only catch was, we didn’t quite have enough to cover this whole area. So with that, Jason had a rather brilliant idea to carve out a space for a large planter, and tile all around it. This idea was especially clever because rain water from our roof can drain directly into it. So stay tuned for updates on the outdoor shower and planter project!
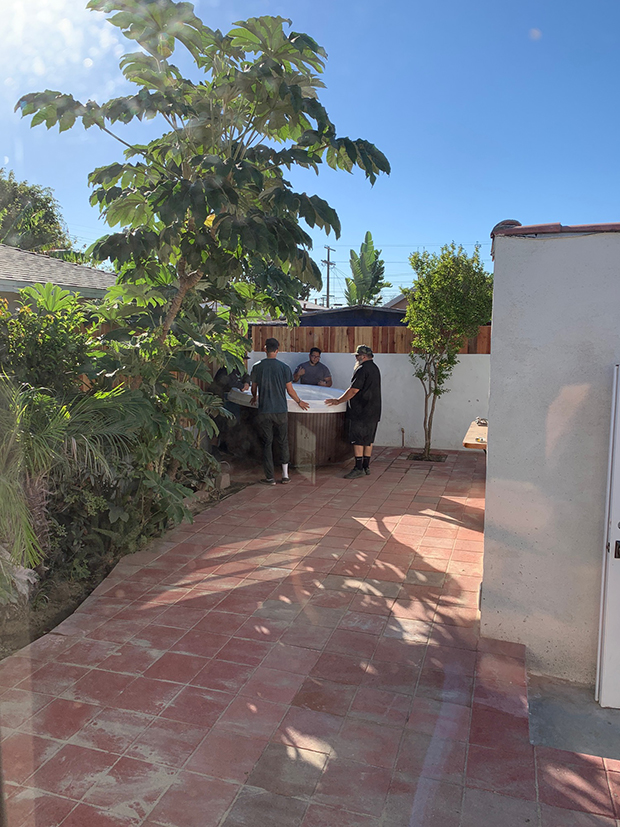
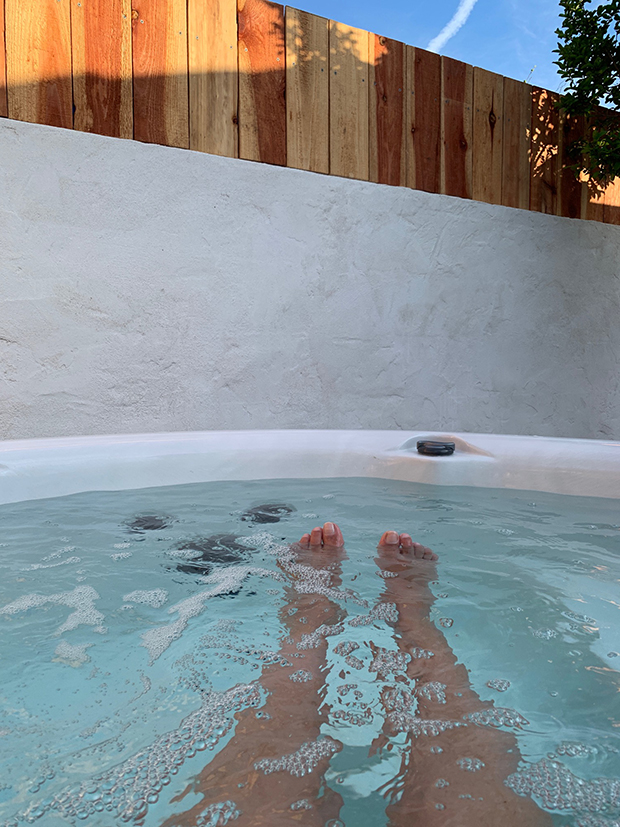
Once the ground was all even and paved, it was time for my long-time dream of having a water situation in our yard become a reality.
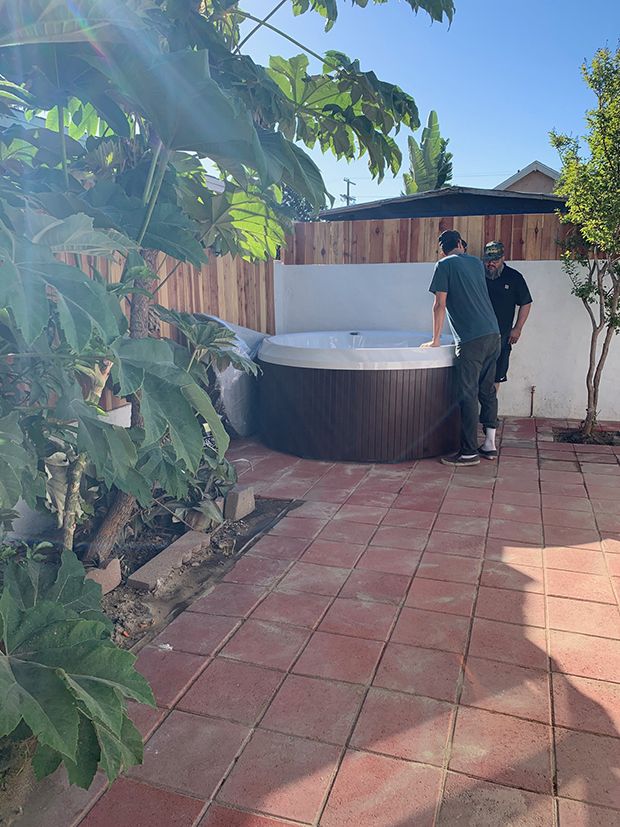
They delivered our jacuzzi on Friday and MY LIFE WILL NEVER BE THE SAME.
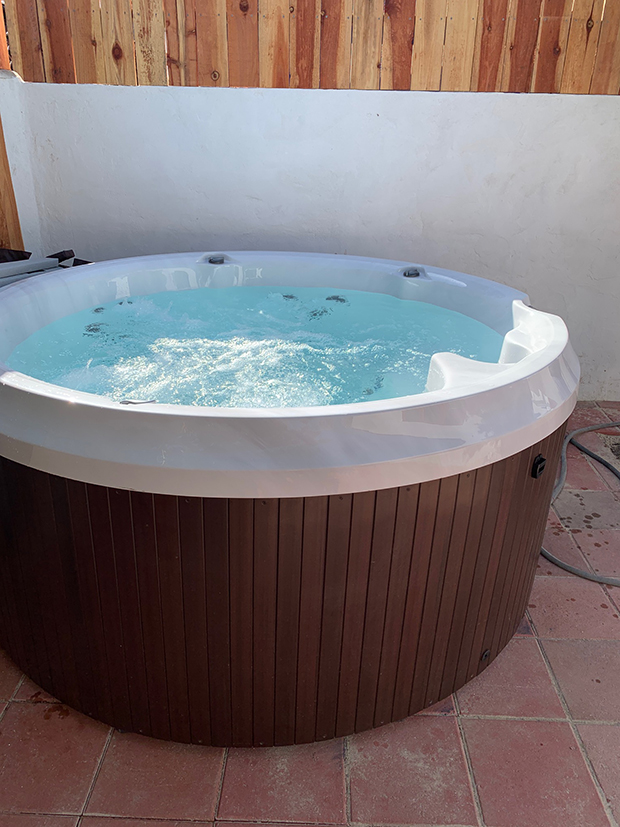
We chose the J-210 from Jacuzzi for a number of reasons, the main one being because it’s round, and I like circles. Lol. We actually went to the Jacuzzi store in Pasadena several times before deciding on this model. For those of you that are local to L.A. and love hot tubs like we do, it’s actually a kind of fun (and romantic??) outing because if you bring your bathing suit you can actually try them out! Fun, huh? It was also among the smaller and more affordable options. And since our yard is small, we wanted to make sure it didn’t totally take over the whole yard.
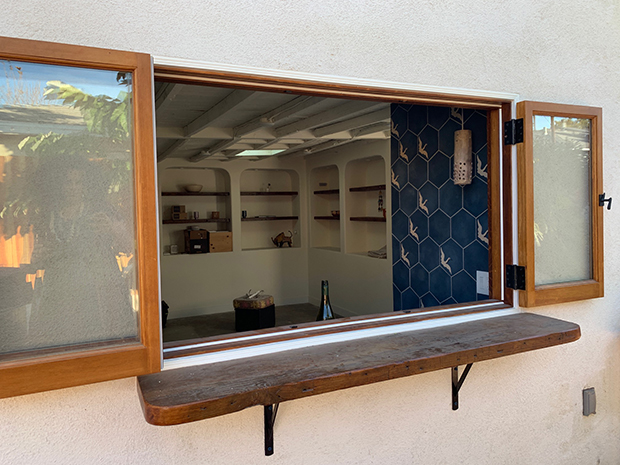
The last feature we’re super excited about is the ‘bar’ window. This custom window that opens up all the way was one of the biggest splurges in the space, not quite as expensive as the hot tub, but almost.
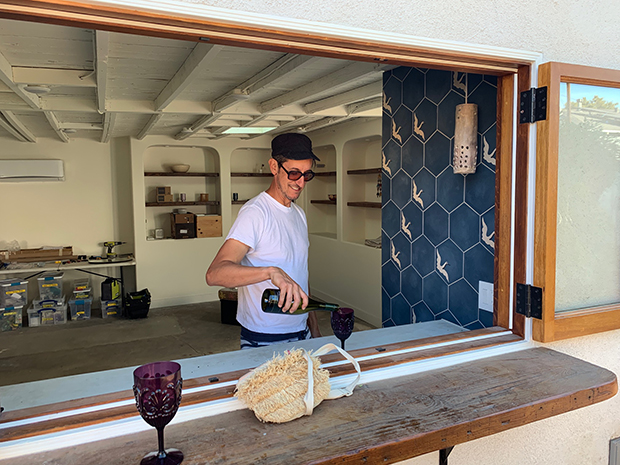
But the moment that Jason served me a glass of wine through the window for the first time I knew it was worth it! Anything that truly connects the outdoors and the indoors is my JAM! I’m gonna be sitting in this window all summer long!!

Here I am! A happy camper! Stay tuned for more updates in the coming weeks and months as we begin to decorate our yard and make it all jungalicious!
I can’t wait to see more! I love following your style although I’m more midcentury modern myself.
Thanks so much!! I love MCM design so much! I just tend to cover up those clean lines in a whole bunch of color and plants! Ha!
oh I do love seeing all this wonderful renovation – and I love all your emails and do tell the girls this repeatedly – thank you for your colour and style and wonderful crazy ideas – Lelle
Awww thanks so much Lelle!
Question about jacuzzi ownership – how much does it cost to heat the thing monthly? Did you get the kind that stays hot all the time or that you have to turn on? And do you have to clean it or how does that work? Any other hidden costs besides chlorine? (Guessing it’s not salt water) Inquiring mind wants to know! ;)
Hi Sally! Honestly I’m not sure. I’ll have to get back to you about this after we get our fist electric bill! As for cleaning it, we got a ‘no-chlorine’ type of tub, and the water needs to be emptied and replaced monthly. There is a powder that we put in after every use (some kind of cleaning chemical, but not chlorine). We shower before every use to help keep it clean. As for hidden costs, I know the filter needs to be replaced every few months, but that it’s supposed to be affordable (around $40). I will let you know more as I have it for longer!
This is so gorgeous! If you are able, could you explain a little more about the cleaning/sanitizing products you are using? We have been contemplating getting a hot tub for our family, but I’ve been hesitant due to chemicals. Sounds like you have found a good solution! You are so amazingly talented!
I’m in love with all your spaces. In the past I have been so conservative in my own home but so drawn to spaces like yours with all the texture and color. I LOVE it!
You inspire me everyday. I love your blog.
Keep up the good work, lots of us need your
home inspirations. : )
awww thank you so much for your kind words! I truly appreciate it!
Oh…I’ve been waiting and waiting for yhis! YAAAY!
As great as I’ve been hoping it will be.
Have you considered doing a mural on your stucco walls???
We painted the side of our long garage, that forms one side of ouf backyard, a brightish blue and then? I just haaad to paint a bright, floral mural on it! Everyone loves it, even people I thought wouldn’t like it. It’s truly vibed the space up 20 notches.
Looking forward to seeing more. :)
LOVE the idea of doing a mural!!! Thanks Rusty!
This is amazing, great job!
Can’t wait for the updates, keep it up!!
Oh Justina!!!!!!!!!!! Not enough heart eyes and exclamation points to describe my enthusiasm for this!! It’s AMAZING. Can you go in to more detail about the Quikrete Stucco? Is this very DIY-able? Like, can I do it and do a good job? I have this vision for a long row of low, outdoor planters in front of my house and of course budget is a concern so I Was thinking of having our contractors construct them out of cinder blocks and covering them in plaster/stucco myself. You’re giving me confidence with this post, but I’m also nervous! Whatcha think?
Hey!
Yes I totally think you can DIY this. I am working on a blog post write up for this that we will post this week so stay tuned! It’s pretty simple!!
OMG a jacuzzi!! You are living my backyard relaxation dreams.
Hello,
I have just been going through your website and noticed that you have amazing content.
I believe I have something that can help you add even more value to your viewers which will increase the time they spend on your page, decrease the bounce rate and add to the user experience. In exchange for using this piece, I would just ask that you link back to our website as the source. Here are few words about Mansha End to End Interior Design Solutions Crafted with Innovation And State Of The Art Technology For Your Modern And Beautiful Homes .We are the top interior designers in bangalore making authentic eco friendly living spaces.
Thank you for your time and I look forward to hearing back from you.
Sincerely,
Mansha Interiors
What do you think about growing some herbs in the garden? Is it what we think it is Geometry Dash Scratch ?